Real estate agencies are constantly collecting and sending information. With even one home buyer, a real estate agent needs to collect the home buyer’s contact information, budget, wants & needs, desired community/location, school district, and so on.
In addition, the real estate professional then sends countless emails, text messages, and phone calls to the potential home buyer relaying information and updates. Add in multiple home buyers and you’ll quickly have a mountain of back and forth communication and information. So, what’s the best CRM for real estate?
With this much information, finding Real Estate CRMs that help real estate businesses collect, organize, manage, and automate interactions with current and potential home buyers becomes an essential tool. With it, you’ll have all the tools necessary to increase your own organization and efficiency, all without having to learn a complicated CRM system.
If you’re in the real estate industry and actively looking for a Real Estate CRM then this article is for you. We’ve put together an all-in-one guide to help you understand which features you should find in a Real Estate CRM and what steps you can take to find the best one for you.
Who benefits from a Real Estate CRM?
Real Estate CRM, or customer relationship management, software provides a number of benefits for both agents and brokers. By keeping track of clients, leads, and property listings in one central location, CRM software can help agents to save time and increase their productivity. In addition, CRM software can provide valuable insights into client behavior, allowing agents to better customize their services. For brokers, CRM software can be used to track agent performance and identify areas where additional training may be needed. It also helps many real estate agents track the performance of real estate teams. In today’s competitive real estate market, CRM software provides a valuable tool for both agents and brokers who are looking to stay ahead of the curve.
How a Real Estate CRM can help you.
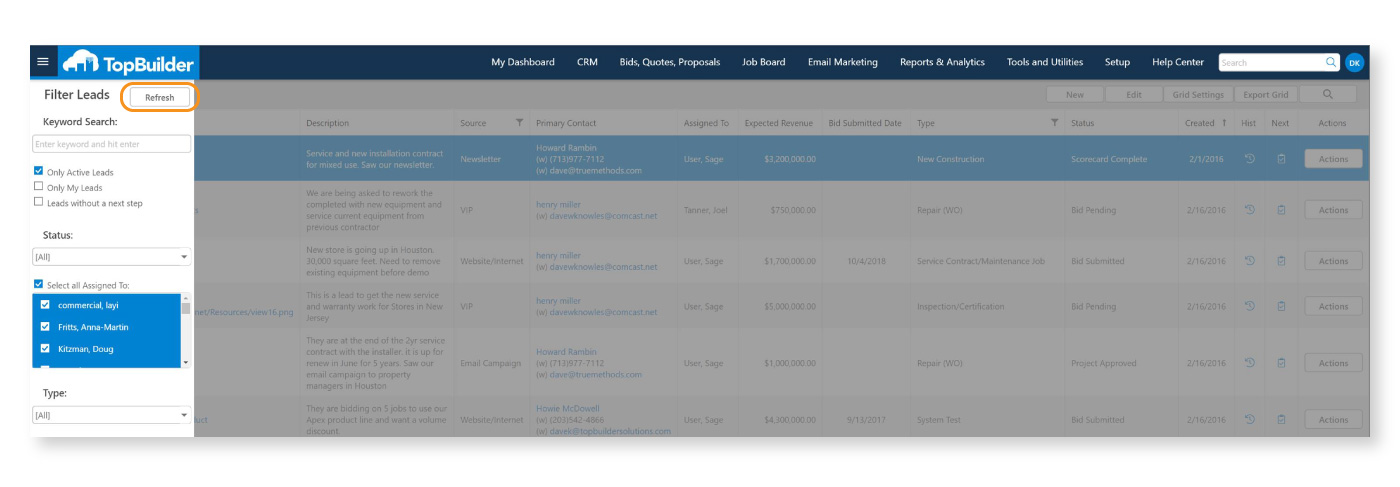
Every CRM collects and stores information.
What makes real estate CRM tools unique is what it’s capable of doing with that information. Unfortunately, not all Real Estate CRM systems are created equal. You’ll need to pay attention to your needs and make sure they align with whichever CRM system you’re evaluating.
At a minimum, your Real Estate CRM system should offer this core functionality.
Real Estate CRM Sales Functionality:
CRM – Information Collection
As mentioned above, the best Real Estate CRMs should be built to help you sell homes faster and easier. You’re probably asking, “so, how does it really help me?”
Well, it all begins with information and data. A Real Estate CRM will help you capture and organize all of your customer’s and potential customer’s information. This information can then be used for multiple purposes, such as nurturing potential home buyers and tracking overall sales progress.
Additionally, all of this information will do wonders for your team communication and collaboration. Since your CRM is capturing and organizing all of your information, your entire team can now share critical information with one another and even send tasks for the next person to complete.
Especially now that more teams are working from home, it’s a perfect way for your team to increase their communication and collaboration, without having multiple check-in meetings throughout the day.
Tools to Manage Online leads (A dedicated online sales counselor (OSC) package)
Nearly 100% of all real estate transactions involve an online search at some point in the buying process.
Once an online buyer contacts you, you must respond as quickly as possible, provide the information they’re looking for and establish a connection with that potential buyer. If that potential home buyer doesn’t hear from you right away or begins to feel like you can’t help them, they’ll likely do business with someone else. It’s the nature of real estate.
A good Real Estate CRM will provide all the tools an Online Sales program needs to capture, respond, nurture, and secure appointments from online marketing channels. with a qualified onsite agent – all with the right timing.
Pricing & Contracts
Negotiating pricing, contracts, and change orders is a critical and often difficult task for many real estate professionals and home builders. Providing the right tools to quickly and professionally negotiate pricing on various base models/plans and options transform an often tedious and uncomfortable process into an enjoyable, productive experience for both the buyer and the agent.
Tracking and electronic signature capabilities save time and frustration following up to ensure the process moves along as scheduled. Additionally, the entire team from agents to builders to owners/managers have access to the contracts and pricing information.
Email Integration
Any Real Estate CRM should make your day easier and reduce the need for redundant and duplicate work
By automating various sales activities, many of those things can be achieved. One major way to automate your sales activities is to have your CRM integrate with your email platform/application.
In other words, if you’re emailing a potential home buyer from Outlook, that conversation would automatically be uploaded under that contact’s history in the CRM. That way, each of your team members can see the email correspondence and know what has been said and by whom.
Additionally, this helps you keep track of multiple potential home buyers, regardless of how long the sale is taking. We all know that home buyers move at different speeds, by keeping a record of your conversations, you’ll know exactly what’s been done already with that potential home buyer, even if they are taking their time.
Last, but certainly not least, without this email integration, your team would be required to copy and paste each email into the CRM. Which, we all know, that just isn’t possible during a busy workday.
Automated Workflows
Another crucial function of any CRM is its ability to automate tasks. These are commonly referred to as workflows. Luckily, TopBuilder’s transaction management tools streamline workflows.
For example, with a proper workflow, you can automate what happens when a new lead comes in through your website.
- 1. A potential buyer fills out a contact form for additional information on your website or third-party site. This interaction will immediately upload the potential buyer’s contact information in your Real Estate CRM.
- 2. The CRM will note the lead source and automatically assign a status.
- 3. The workflow will add this new lead to your business newsletter/email list.
- 4. The potential buyer will receive an automated email notifying them that the form was completed correctly, and they’ll be contacted soon.
- 5. A notification is sent informing the team a contact form has been completed. This automated alert can be sent to one team member or multiple team members.
- 6. This new potential buyer is then assigned to a sales agent.
- 7. The sales agent is then sent an automated task reminder to follow-up with the potential buyer.
It certainly doesn’t have to stop with the last step. These workflows can grow as the need arises in your company. Ideally, you would build these workflows for numerous sales and marketing activities needed by your team.
Content Management
With content management software, you can store, categorize, and manage reusable content and templates.
This functionality has the potential to save you and your team hours each week by helping you and you easily grab email templates, documents, FAQ responses, images, and more with the click of a button.
If you have multiple real estate agents, it can help reduce their time spent writing emails to commonly asked questions. Additionally, it ensures your team members are following the company’s communication standards.
Document Management & Storage
With document management and storage, you can keep all of your documentation in one place. This helps you and your team coordinate which documentation has been completed and what hasn’t.
Also, this isn’t limited to just documentation. Document management should store client documents, contracts, home photos, home specs, etc.
Reports & Analytics
As we all know, traffic is everything for selling homes. Healthy traffic into your homes leads to a steady flow of sales.
With the right sales and marketing reports, you can quickly measure the effectiveness of your sales and marketing activity. This can tell you the number of leads you’ve received, the source of those leads, and how many potential buyers have progressed through the sales process.
Powerful reports like these can tell you the health of your real estate business at a glance and give you the information you need to make better business decisions.
Real Estate CRM Marketing Functionality:
Email Marketing
A Real Estate CRM would not be complete without an email marketing tool. This is important because you need to promote your inventory at the right time to the right audience. Without an email marketing tool, this task can be cumbersome and time consuming for you and your team.
Real estate professionals commonly use a email marketing campaigns to announce new homes, realtor events, open houses, grand openings, buyer incentives, and more to generate more traffic. This tool alone can significantly impact your ability to push leads through the sales funnel and keep them interested in buying a new home from you.
Newsletter Package
Newsletter functionality is similar to email marketing. However, there are a few slight differences we wanted to emphasize.
A newsletter feature is commonly a monthly mass email sent to your potential buyers. This monthly email is used to update prospects on new inventory, completed specs, new lots, new pricing, and helpful content.
This newsletter functionality is a great way to keep you top of mind to all of your prospects.
Lead Capture Tools
Lead capture tools are used to automatically add new real estate leads to your Real Estate CRM. In other words, if someone completes a contact form on your website or a third-party source, your lead capture tools will automatically upload that new contact into your CRM.
This feature commonly kicks off a new lead generation workflow to notify your team and send automated email responses to the new potential home buyer.
Additionally, these tools generate leads and use popular third party integrations. For real estate professionals, these tools can help you collect, organize, and manage leads from online platforms such as Zillow, Trulia, Realtor.com, BDX (New Home Source), and many more.
Website Tracking
Website tracking features are used to help you and your team know which potential buyers are returning to your website.
Once a potential home buyer has filled out a contact form, you can follow their activity on your website. This functionality can tell you which pages they’ve visited, how much time they’ve spent on those pages, and which content interests them the most.
This functionality also has the ability to notify you when key prospects are visiting your website. Giving you insights into who’s the most interested and who you should be contacting.

How to find the best Real Estate CRM.
With any software purchase, we recommend you start by creating a list of your needs and wants. Once those have been documented, then write down your software budget and your timeframe for starting with your new real estate CRM software system. These few details will help your potential software provider considerably and help them customize any demonstrations.
Now, when you are in your software demonstration, we recommend have a list of questions ready. Below are a few questions to help you get started. They aren’t the only questions you should ask, but it’ll get you going in the right direction.
What is the on-boarding process?
Each software provider will have their own unique on-boarding process. This process can take anywhere from a few weeks to a few months. The length of this onboarding process can change based on a variety of factors.
However, be cautious if the software provider expects you to do most of the work during this process. This can be a sign that the software provider is more hands-off with new customers, which can also be an indicator of a slow onboarding process. This is important to note because the longer it takes to learn the software, the longer it will take for you to see a positive return on your investment.
How is individual & company data protected?
A great Real Estate CRM system will collect your company information and your contact’s information. With your software provider storing this much sensitive information, it’s important for you to know how your data is protected.
Additionally, it’s important for you to know how your data is backed-up in the event of a system failure. Be sure to ask:
How do you protect my data?
- If there is a system failure, what would happen to my information?
- Do you share information with any other business entities?
- Do you sell information with any other business entities?
- If you feel uncertain about any answers to these questions, you can ask for their privacy policy and their terms of service. This documentation should outline exactly what they can do with your information and data.
What are your training & support policies?
You and your team will need multiple training and support sessions to learn the new Real Estate CRM. It’s important the training and support system offered by your software provider is structured and documented.
This will help you and your team learn the system quickly, lower confusion, and increase technology adoption by your team. So, when you are evaluating a software provider’s training and support structure, be sure to ask:
-
How does my team receive the training they need to learn the software system?
- Is this in-person, video conference, online courses, documentation?
-
When will training be available to me and my team?
- Is this daily, weekly, monthly training?
-
Which training comes at an expense to me?
- You should receive some form of free training.
Additionally, be sure to ask them how they handle support tickets. Your new software provider should have a system built to handle critical issues, important issues, and moderate issues.
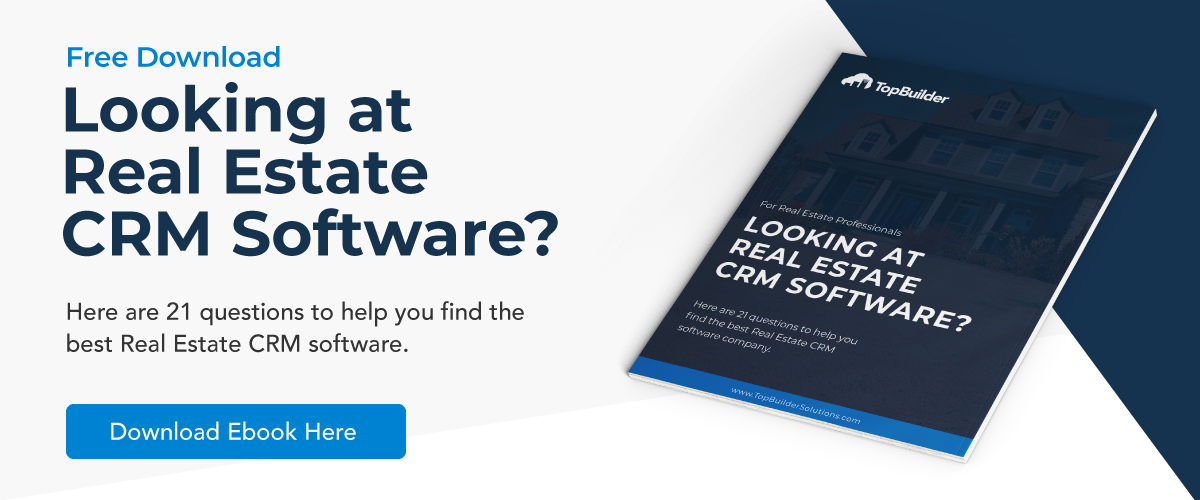
Again, these are just a few questions you should be asking when evaluating any real estate and new home sales software system. If you want to see our full list of recommended questions, you can access our free download here.
Advanced Features
- Client management
- Task management
- Online sales management (OSC)
- Lead management
- Contact management
- User interface
- Lead generation services
- Model, Elevation, and Option management
- Inventory management
Final Comments
A Real Estate CRM is a versatile software system. One that provides numerous capabilities to help you sell more homes quickly.
If you’re actively looking for a Real Estate CRM, use this article to help you document which features are critical to you and your real estate business.
Again, the goal of any Real Estate CRM is to increase home sales. Actively look for features that help you collect, nurture, and convert prospects into new home buyers.
If you’re looking for a software system to utilize all of the features listed above, we invite you to explore our Real Estate CRM system. You can review TopBuilder’s software by going here.